| | | | |
| |


|
|
A spirited game of road hockey (and the broken window that follows) leads Brigitte to replace her front window and her dining room window too.
 |
 |
 |
 |
 |
 |
|
 |
DO consider your location and house design when choosing your new windows. Choose the style that best suits your needs.
|
 |
DON’T take out your old windows before your new ones have arrived.
|
|
 |
 |
 |
 |
I Can See Clearly Now the Old Windows Are Gone
- There are four different styles of windows: casement, double-hung, awning or sliding. Casement windows have cranks to open the windows outward from the side. Double hung windows have sashes that slide up and down. Awning windows open outward from the bottom and look like an awning when they’re open. And sliding windows, as the name suggests, have sashes that move side to side. All these styles are now made with modern materials and glazings. Choose the style that best suits your house design and location.
- Brigitte’s windows are double-hung with PVC sashes. The PVC sashes are attractive, come in a variety of colours and require very little maintenance. Her windows also have a low-E glazing to filter out UV rays. She still has sunlight streaming into her home but no more sun-faded furniture or flooring!
 |
|
 |
| Fig. A |
|
Fig. B |
- Before installing a new window, you need to remove the old one. Pry off the interior trim and remove old shims and sashes. Brigitte’s new window is slightly bigger than her old one. If that’s the case, you’ll need to make a bigger hold to accommodate the larger window. The hole should be about 1 ½ inches larger than the window measurement to allow for insulation, shimming and vapour barrier.
- Before cutting through you wall, check for wiring and other obstructions in the area you intend to remove. Turn off your power just in case you missed something. You don’t want to get a nasty jolt! (see fig. A)
- Measure and mark the area to be cut. Use a reciprocating saw to cut through the drywall, the insulation, the studs and the exterior wall. With your opening prepared, you’re ready to start framing. Begin with the header. Screw 2 x 4s or 2 x 6 into place. With the header in place, you can measure and frame from the top down. (see figs. B & C)
 |
|
 |
| Fig. C |
|
Fig. D |
- Next comes the bottom sill. Screw 2 x 4s into place along the bottom of the window frame.
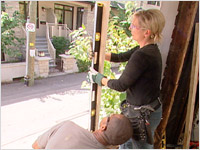
- The sides are next. Measure and install the 2 x 4s for the sides of the frame. Check for level. (see figs. D & E)
- With the framing complete, you can now set your windows into place. (see fig. F)
 |
|
 |
| Fig. E |
|
Fig. F |
- Hopefully, you have windows available to install. If you have a wait for a while, like Brigitte did, cover the hole with plywood to keep out the elements. You can look at ugly old plywood if you want, or you can create a canvas sensation to hang in front. Assuming that, like Brigitte, you have the time and a talented painter friend.
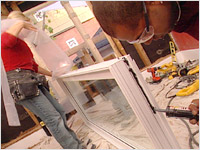
- When your windows are ready to go in, you need to wrap them with a strip of vapour barrier. Run a bead of caulking along the sides, top and bottom of the window; press the vapour barrier into the caulking. (see fig. G)
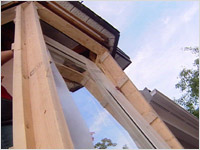
- Install the window sill-first, tilting into place. (see fig. H)
 |
|
 |
| Fig. G |
|
Fig. H |
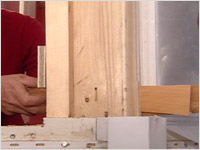
- Place shims to snug the window into position. Place these shims where the pilot holes of the window are so that when the window is screwed into place, the shims are penetrated and secured as well. Check to make sure that the window is plumb and level. Install more shims where required. (see fig. I)
- Check to make sure the window functions properly and then screw into place. Use the pilot holes. (see fig. J)
 |
|
 |
| Fig. I |
|
Fig. J |
- Trim the vapour barrier. Tuck in insulation.
- Install the finish trim around the interior and exterior of the window. Paint your trim and you are finished!
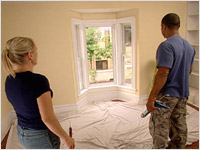
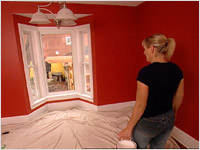
- Enjoy the view. (see figs. K & L)
- And you might want to move the hockey game down the road to your neighbour’s house…
 |
|
 |
| Fig. K |
|
Fig. L |

| Custom Bay Windows |
|
NuView Designs
18-B Bentley Ave.
Ottawa, ON K2E 6T8
613-828-8512
|
| Custom Bay Windows |
|
Theo Mineault
1454 Cyrville Road,
Gloucester, ON K1B 3L9
613-744-8244
|
| Waste bin |
|
BFI Canada
125 Walgreen Rd,
Carp, ON K0A 1L0
613 836-6900
|
| Artist |
|
Karen McRae
|
|
|
|