| | | | |
| |


|
|
Brigitte has new siding. Brigitte has new mortar. Brigitte’s house looks great…except for that old wooden front porch. Interlocking stone steps are a much better idea.
 |
 |
 |
 |
 |
 |
|
 |
DO tamp, tamp, tamp! You need a solid base for interlock so that it remains level forever.
|
 |
DON’T use anything but polymeric sand to finish the job. This special sand hardens when wet to prevent shifting and weed growth between the stones.
|
|
 |
 |
 |
 |
Stairway to Avon
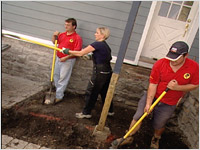
- Your steps need a firmly compacted, properly prepared base and the first thing you do is excavate to a depth of 9 inches. This allows for 9 inches of granular stone and 3 inches for the interlocking brick. (see fig. A)
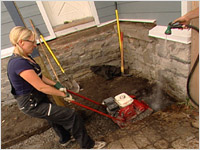
- Once the excavation is complete, level and tamp down the area using a power compactor.
- Place a layer of black membrane over the entire excavated area. This is not your garden-variety landscape cloth. It is a geosynthetic membrane designed to hold in the gravel for compact packing.
 |
|
 |
| Fig. A |
|
Fig. B |
- Roll in the granular stone. Do this is two stages. First, fill the area to the 2-inch level with the stone. Smooth to a level surface, dampen with a hose and tamp down using the power compactor. Then bring in the remaining stone and smooth out to the 6-inch level. Dampen with the hose and compact. This brings it to a level 3 inches below grade. (see fig. B)
- Install the base row of stones around the perimeter of your marked area. If there is a “lip” on your stone, you need to chisel it off for the base row.
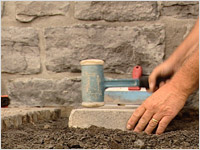
- Some of these stones will become steps to the porch; others will become the side wall. It all comes down to how you stack ‘em. Tamp each stone into place using a soft hammer. (see fig. C)
 |
|
 |
| Fig. C |
|
Fig. D |
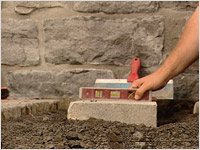
- Important! Each stone needs to be level. (see fig. D)
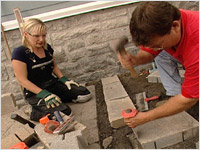
- To cut stones to the desired size, score the stone with a brick chisel and hammer. Continue chiselling along the scored line until the stone splits. (see fig. E)
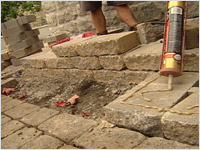
- Brush any dust off the completed first row and prepare to lay the second course of stone. Apply a bead of concrete adhesive and lay the second course of stone on top. (see fig. F)
 |
|
 |
| Fig. E |
|
Fig. F |
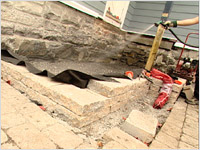
- Now you need to backfill to prepare for further building. Roll out another layer of geosynthetic membrane. Cover with gravel. Spray with water and tamp into place. (see fig. G)
- To create steps, place the stones back from the edge the width of a step. Level and tamp into place. For the outside wall, continue building vertically, applying a bead of concrete adhesive between each course of stones.
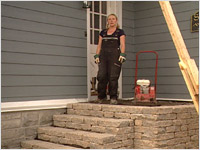
- Continue building upwards, backfilling with granular A and tamping after each step, until the desired number of steps is reached. (see fig. H)
 |
|
 |
| Fig. G |
|
Fig. H |
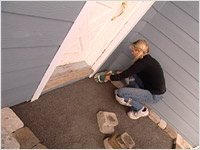
- At this point the landing part of your new front porch is still just well compacted granular A. Complete the picture by placing your interlocking stones into position on the landing. (see fig. I)
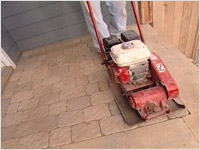
- Sweep the surface clean and tamp down with the power compactor. (see fig. J)
 |
|
 |
| Fig. I |
|
Fig. J |
- Make sure that the surface of the stone is dry. This is very important. You are about to install the Permacon® polymeric sand and it needs to be applied to a dry surface. This special sand fills the cracks between paving stones but it hardens when wet. You don’t want it to harden until AFTER it is safely nestled into the stonework.
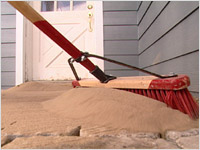
- Use a stiff bristle broom to sweep the polymeric sand to 1/8” below the top of the stone. Get it into every crack then sweep away the excess. Make sure that there is none remaining in the dimples of the stones. (see fig. K)
 |
|
 |
| Fig. K |
|
Fig. L |
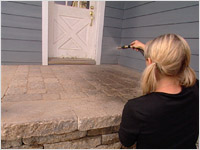
- Once you are certain that the surface is clean, spray it with a light mist of water. Dampen until the surface sand is wet, or for about 20 – 30 seconds. Wait 2 or 3 minutes and then dampen again for the same amount of time. When the polymeric sand dries, it goes hard and locks the bricks in to place. (see fig. L)
- Let dry for four hours before walking on the stones.
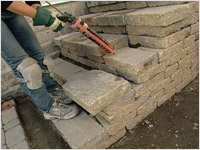
- Once this is dry, place the capstones for your steps. Fill in and around the capstones with polymeric sand and follow the same procedure as for the landing. (see fig. M)
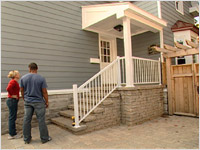
- Stand back to embrace your inner mason and to enjoy your brand new porch! (see fig. N)
 |
|
 |
| Fig. M |
|
Fig. N |

| Foundation re-pointing |
|
Korek Masonry
Adrian Korek
613-798-4401
|
| Work Crew |
|
S.J. Blondeau Landscaping Services
Steve Blondeau
613-978-4000
|
Bergerac Pavers (manufacturer) available at Merkley Supply Ltd. For other locations, please check their website.
|
|
Permacon
|
| Bergerac Pavers (supplier) |
|
Merkley Supply Ltd.
100 Bayview Rd.
Ottawa, ON K1Y 4L6
613-728-2693
|
|
|
|