| | | | |
| |


|
|
The roof for Brigitte’s old porch was the perfect size for her old porch. But it was way too small for her beautiful new deck. She extended her roof to give a finished look to her deck area.
 |
 |
 |
 |
 |
 |
|
 |
DO consider the slope of your new roof. Brigitte followed the contours of her existing roof but if starting from scratch you need to work out how steep you want your roof to be.
|
 |
DON’T worry about venting. There’s plenty of air circulation beneath a deck roof so there’s no worries about condensation build-up.
|
|
 |
 |
 |
 |
Roof the Deck with Boughs of 2 x 6
- Putting a roof over your deck is a lot like building a lean-to. It’s really half a roof with the peak supported by the side of the house rather than by another part of a roof. The same principle is used for carports and patios.
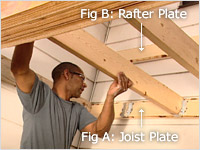
- Begin by installing the joist plate to the exterior wall of the house. (Screwed securely into the studs.) This is 2 x 6 board, usually placed at an eight-foot height, to which the joists are attached. (see fig. A)\
- Next attach the rafter plate to the exterior of the house. The placement of this 2 x 6 board determines the pitch of your roof. There’s no certain pitch required for a roof. But it should flow with the design of your home and not meet any obstacles like windows. (see fig. B)\
 |
|
 |
| Figs. A & B |
|
Fig. C |
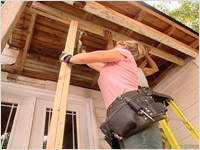
- With these two boards in place you can place all the necessary corner posts for the roof. Brigitte was extending an existing roof so she needed to support the old part of her roof with a temporary post and a temporary beam until she got the new pieces in place. If you’re starting from scratch, place 4 x 4 posts surface strong enough to support the weight of the roof. This could mean a cement pad or cement posts made with sona tubes. Attach the posts using post anchors. (see fig. C)\
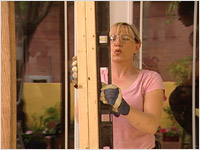
- If the post is freestanding, brace it temporarily with 2 x 4s to hold it upright while you establish level. If the post is next to a wall, like Brigitte’s you can establish level then screw it directly into place. (see fig. D)\
 |
|
 |
| Figs. D |
|
Fig. E |
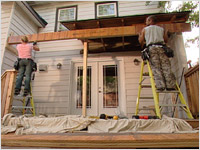
- Next you need to place the header beam. Brigitte used a piece of 2 x 10 piece of laminated veneer lumber (LVL). This is a layered product that provides more strength than a traditional 2x10 wood beam. (see fig. E)
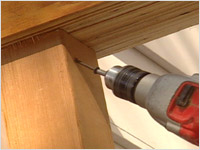
- This beam is toenailed into place. That means that it is attached to the corner posts by screws placed at an angle. (see fig. F)
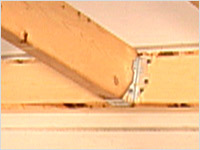
- With the header in place you can hang the rest of the joists. These are 2 x 6 boards. Nail metal joist hangers on 16-inch centres to the joist plate and the header. (This means that there’s sixteen inches from the centre of one board to the next.) Drop the joists into the hangers. Nail the joists into place. (see fig. G)
 |
|
 |
| Figs. F |
|
Fig. G |
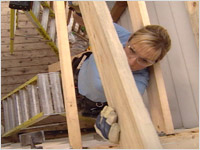
- The rafters are next. One end of each rafter needs to be cut at an angle that matches the pitch of the roof. The other end extends past the header for an overhang. Once you’ve established the appropriate angle and length, you can use one rafter as a pattern to cut the others. Toenail the new rafters into place on 16-inch centres above the joists. (see fig. H)
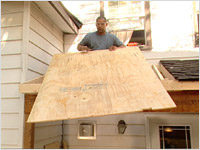
- It’s time to install the plywood sheathing. Use 3/8-inch plywood cut to the right dimensions. Nail it into place on the rafters. (see fig. I)
 |
|
 |
| Figs. H |
|
Fig. I |
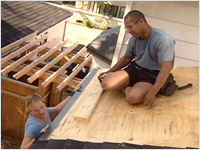
- The next step is to install a “drip edge” around the edges. This protects the cut edge of the plywood and encourages water flow into the eaves trough. (see fig. J)
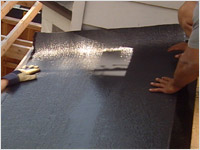
- Brigitte’s house is in a cold climate so she needs an ice and water shield to protect the roof from snow damage. Roll out the waterproof membrane, being certain to overlap each “course,” or pass across the roof. Start at the bottom and work your way up to the top. (see fig. K)
 |
|
 |
| Figs. J |
|
Fig. K |
- Your roof is now ready for shingles. To make sure that your shingles are straight, snap a chalk line to be your guide for the starter strip. (If the manufacturer doesn’t provide a starter strip, cut the tabs off of some shingles to use as a starter strip.)
- You want to make sure that the joints of the shingles are staggered. Cut 6 inches off of the first shingle in the starter strip before placing it. This sets up the placement of the joints so that subsequent rows will be staggered. Complete the starter strip along the length of the roof, being sure to allow a 1-inch overhang over the lip of the eave. This provides that little bit of extra support to the first row of shingles.
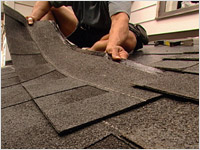
- Now you can begin laying the shingles. Place the first “course” or row over the starter strip. (If you lift the first shingle, you can see why we cut 6 inches off the starter strip – the joints are now staggered.) (see fig. L)
- Use 4 nails per shingle.
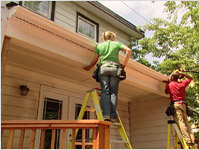
- Place the first shingle in each subsequent course 6 inches over from the row below for the staggered effect. When the entire roof is shingled, complete the job by installing flashing around vents, chimneys and roof junctions. (see fig. M)
 |
|
 |
| Figs. L |
|
Fig. M |

Roof Shingles (manufacturer) available at Covoy Supply Ltd. For other locations, please check their website.
|
|
GAF Materials Corp.
|
| Roof Shinges (supplier) |
|
Convoy Supply Ltd.
810 Belfast Rd.
Ottawa, ON K1G 0Z5
613-260-5402
|
| Telescopes and Expertise |
|
Focus Scientific
1489 Merivale Road
Ottawa, ON
613-723-1350
|
|
|
|