| | | | |
| |


|
|
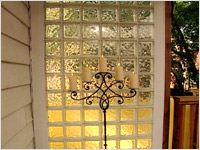
Out with the dull, in with the dazzle! The wall at the end of Brigitte’s deck was depressing and ordinary. But her new glass block wall reflects light into the deck area while still maintaining her privacy.
 |
 |
 |
 |
 |
 |
|
 |
DO make certain that the area where you’re installing glass block is perfectly level and square. You can’t cut glass block.
|
 |
DON’T think that glass block is for indoor applications only. Glass block can make a beautiful addition to outdoor areas. |
|
 |
 |
 |
 |
Just Another Glass Block In the Wall
- There are several different types and colours of glass block to choose from. Buy your glass block before you start work so that you can frame your work area to the right size for your blocks.
- Glass block comes with plastic runners and spacers to make the installation job very easy. The runner is a square gutter that the blocks sit in. The spacers are placed in between each block to allow for consistent spacing.
- But you still have to start with a level, square space. You can’t cut glass block.
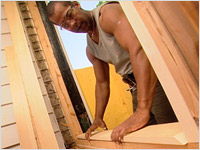
- Build a frame of 2 x 4s to accommodate the plastic runners for you blocks. You need to make the frame the right size for your blocks, taking into account the size of the blocks and the spacers between each. If the work area is not level, you may need to use shims to level out the frame. (see fig. A)
 |
|
 |
| Fig. A |
|
Fig. B |
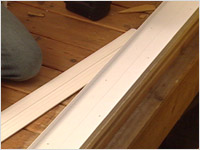
- Once your frame is complete, screw the plastic runners around all sides of the framed area. (see fig. B)
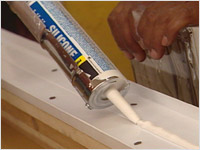
- Run a bead of silicon down the centre of the runner and along both edges. Run a bead of silicon up the side wall where the first glass block sits. Place your first block. (see fig. C)
 |
|
 |
| Fig. C |
|
Fig. D |
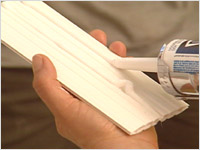
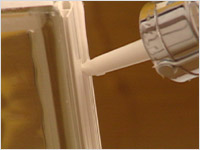
- Run a bead of silicon along the centre of both sides of the spacer and along both edges. Tuck the spacer in beside the block that is already in place. (see figs. D & E)
- Place the next block and the next spacer, making sure to run silicone beads along the centre and the edges of the spacers. Complete the first row.
- You can now place the longer vertical spacer on top of your row of glass blocks. But, you guessed it, silicone first. (see fig. F)
 |
|
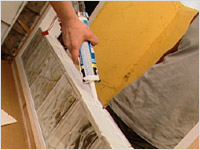 |
| Fig. E |
|
Fig. F |
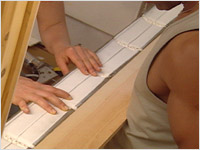
- Before you carry on, hold a straight edge (a piece of wood, a yardstick) up next to your row of glass blocks to make sure that they are all seated straight. If they are slightly out of line now, they’ll throw out the balance of the whole wall. You need to do this after every row. (see fig. G)
- Continue placing the glass blocks, running beads of silicone for each block and spacer. Check each row with a straight edge as you work.
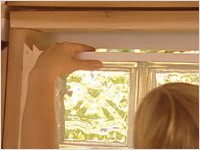
- When you finish building your wall, top with the cap provided. (see fig. H)
- Let the silicone dry for 2 hours.
 |
|
 |
| Fig. G |
|
Fig. H |
- Cut away any excess silicone that my have seeped out of the joints.
- Mix the mortar for the joints according to package directions. Don’t overmix – you don’t want bubbles in your mortar or it won’t be as strong.
- Place the mortar mix into a mortar bag. As Anthony can tell you, this is very much like an icing bag, only bigger. (He’s so good with his hands!)
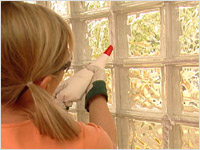
- Apply mortar around all the joints. (see fig. I)
- Wipe away the excess mortar. Clean the glass surface of the blocks with a wet sponge, being careful not to remove the mortar from the seams.
- Let the sun shine in! (see fig. J)
 |
|
 |
| Fig. I |
|
Fig. J |

| Glass Blocks (supplier) |
|
BMR/Builders Warehouse
3636 Innes Rd.
Orlean, ON K1C 1T1
613-824-2702
|
Glass Block (manufacturer) available at BMR/Builders Warehouse. For other locations, please check their website.
|
|
Weck
|
| Table settings and party supplies. |
|
Cody Party
1460 Merivale Road,
Nepean, ON K2E 5P2
613-226-4780
|
| Wedding Cake Gallery |
|
Pasticceria Gelateria Italiana Ltd.
200 Preston St.
Ottawa, ON, K1R 7P9
613-233-2104
|
| Bridesmaid/Wedding Dress Location |
|
Martino’s Fashion And Bridal
2527 Bank Street,
Ottawa, ON K1V 8R9
613-739-5034
|
| Wedding Dress Rental |
|
Kim Lynn Bridal
320 Bronson Ave
Ottawa, ON K1R 6J3
613-238-2708
|
|
|
|