| | | | |
| |
S


|
|
When Brigitte tries rock climbing she discovers that the only “sheer drop” that she wants to be near is the one that comes with her backyard waterfall feature.
 |
 |
 |
 |
 |
 |
|
 |
DO look for a Micro Pondless Kit to help you build your waterfall. It makes it SO easy.
|
 |
DON’T hurry selecting the rocks for your feature. Pick the ones that are just right.
|
|
 |
 |
 |
 |
Water-Falling in Love
- If you want a child-safe, low-maintenance water feature for your backyard, a Pondless Waterfall is just what you’re looking for. The water recycles so all you have to do is refill the reservoir periodically. And there’s no sitting water for algae to build up in or for children to fall into.
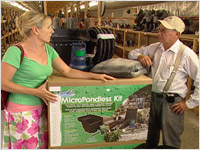
- A Micro Pondless Kit provides you with the basics that you need for a backyard waterfall feature: the waterproof membrane, the snorkel, the pump, the bio-filter, the pump and the bucket. You can design the rocks around that basic kit however you want. (see fig. A)
 |
|
 |
| Fig. A |
|
Fig. B |
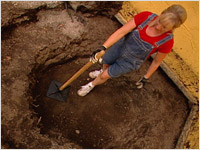
- Once you’ve purchased your kit and selected your rock, start by digging a hole two feet deep. You need a hole deep enough to cover the snorkel (the housing for the pump.)
- Call before you dig! Unexpected explosions are not good for the perennials.
- Compact the bottom of the hole using a tamper. Good exercise! (see fig. B)
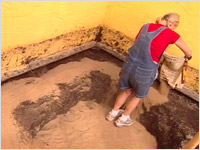
- Line the bottom of the hole with a layer of sand. This cushions the surface so that no twigs or pebbles will puncture the waterproof membrane. (see fig. C)
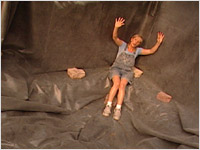
- Lay the waterproof membrane out over the bottom and sides of the hole and up the wall as high as the waterfall feature will reach. Cover the bottom with a layer of river rock to hold it in place. (see fig. D)
 |
|
 |
| Fig. C |
|
Fig. D |
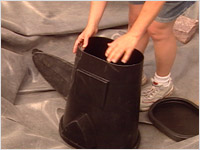
- Put the pump in the snorkel and place in the bottom of the hole. Connect the bio-filter to the pump. The bio-filter prevents larger items, like leaves, from being pulled into the pump. (see fig. E)
- Connect the pipe to the pump and run it around to the side and back of the feature.
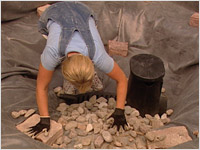
- Put the cap on the snorkel and cover it entirely with river rock. You won’t be able to see it at all. (see fig. F)
 |
|
 |
| Fig. E |
|
Fig. F |
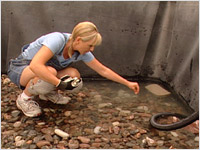
- Wash the rocks and use the pipe attachment to pump out the dirty water. (see fig. G)
- Now you get to create your wall. Leave enough room behind the wall for the water pipe to run. Put the pipe in place before you start.
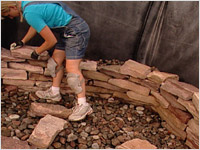
- Build from the ground up, choosing rocks that complement each other and form the desired shape. You can incorporate nooks for plants or pots if you wish. Be careful not to puncture the waterproof membrane with the sharp edges of the rocks. If necessary place a small extra piece of waterproof membrane between a sharp rock corner and the membrane for extra protection. (see fig. H)
 |
|
 |
| Fig. G |
|
Fig. H |
- No need to join a gym doing this project. Hoisting the rocks around is better than an intensive workout with a personal trainer.
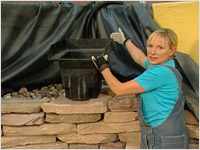
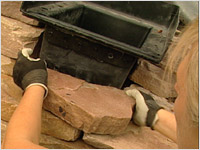
- Place the reservoir bucket at the desired height. Brigitte also put a “sheer drop” tray in place. This is a flat piece that makes the water drop in a sheet of water. (see fig. I)
- Connect the pipe to the back of the reservoir bucket. Surround all of this with rocks. (see fig. J)
 |
|
 |
| Fig. I |
|
Fig. J |
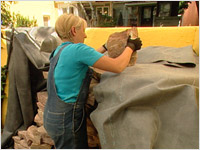
- Cover the top of the bucket with plywood and wrap the waterproof membrane forward over it. Cut off any excess membrane. Cover with rocks. (see fig. K)
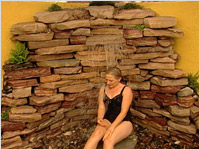
- Cover any exposed pipe and other areas with small pebbles. If you wish, place a larger rock under the falls so that you can sit and let the water flow over you.
- Tuck plants of pots in between the rocks to complete the look.
- Fill up the reservoir, sit back and enjoy. (see fig. L)
 |
|
 |
| Fig. K |
|
Fig. L |

Aquascap Pondless® Waterfall Kit (supplier) as well as Slate, River Rock, Gravel, and the Bolder seat.
|
|
K&B Lawn Ornaments
1770 Manotick Station Road,
Greely, ON K4P 1K4
613-821-7953
|
| Aquascap Pondless® Waterfall Filters (supplier) plus expertise |
|
The Pond Centre
215 Stafford Rd. West, Suite 102
Nepean, ON K2H 9C1
613-721-2211
|
| Aquascap Pondless® Waterfall Kit (manufacturer) available at K & B Ornaments and The Pond Centre. For other locations, please check their website. |
|
Aquascape Designs, Inc.
|
|
|
|