| | | | |
| |


|
|
A revival in open-concept home designs has many homeowners eyeing their interior walls and dreaming of uninterrupted home spaces. Brigitte wanted more flow between her living room and her dining room. When she started demolition without consulting an expert, Anthony gave her some important lessons on load-bearing walls.
 |
 |
 |
 |
 |
 |
|
 |
DO remember that your walls may do more than divide rooms. They could be part of the support system for your home.
|
 |
DON’T trust the advice of neighbours or friends. Sometimes walls that don’t look like they’re doing any work can be an important structural component in your home. Consult a professional.
|
|
 |
 |
 |
 |
- When home designers plan homes, one of the fundamental considerations is the soundness of the structure and the distribution of “load.” Will the structure remain standing under normal usage? Designers make sure that the weight, or load, of the home is distributed effectively. The load is distributed through the walls of the home, both interior and exterior. If homeowners want to change this load distribution later, they have to transfer the load effectively.
- Load-bearing walls hold up your house. If you remove one without redistributing the load your floors could warp and walls could crack, or worse. Your house could collapse.
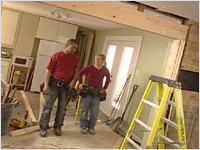
- Brigitte was so keen to install her three-sided fireplace that she got her dust mask and her sledgehammer out and started tearing down the wall. This is a no-no.
- Before you start the demolition, hire an architect or a homebuilder to come and look at your house to determine which walls are crucial to the stability of the structure. In some instances, a building permit may be required.
- If the professionals say that a wall you really want to tear down is load bearing, don’t despair. You still have options. You just need to figure out how the load that that wall is carrying is going to be redistributed. This means creating a new path for the load.
- Usually, the wall that is being taken down consists of the standard framing of studs placed at 16-inch intervals. The most common replacement for this stud framing is a ceiling beam along the top of the replaced wall with sturdy support columns at either end. So instead of the load being spread over several studs at closer intervals, the weight is carried to the two support columns at the end. This is similar to how tent poles placed around the outside of a tent carry the weight of the canvas without the need of inner supports.
- Now, we have to consider that the weight that used to be borne by an entire wall is being centred in two places. The entire weight must be transferred all the way down to the foundation, or if there is a basement in the home, additional support jacks may be required down below. Consult an engineer for the best solution for your home!
- But don’t get too crazy with the sledgehammer just yet. You need to consider how to redistribute the weight DURING construction. This means shoring up the wall with temporary support beams held in place with metal “jacks” that you rent from your local rental depot.
- You’ll need temporary support beams and you make these by nailing together two 2 x 6’s.
 |
|
 |
| Fig. A |
|
Fig. B |
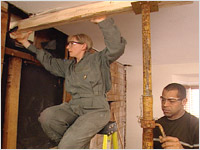
- Remove the wall coverings, (drywall, etc.) but leave the studs in place. Insert the support beams through the open wall perpendicular to the wall that is to be removed. Hold them up against the ceiling, place the shoring jacks under each end and tighten. Consult a professional about any additional shoring that may be required. (see fig. A)
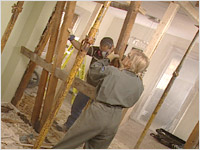
- Once your ceiling is supported, you can take down the existing wall and begin to place the new ceiling beam and column supports. (see fig. B)
 |
|
 |
| Fig. C |
|
Fig. D |
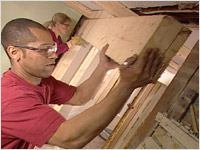
- Build your beam first. Again, consult an engineer or architect for the best solution for your house. One way, and the one that Brigitte used, is created by screwing together three 2 x 10 pieces of wood. Now you’ll need something to support it. The columns at each end are made by screwing 3 2 x 6 pieces of wood into the existing structure. Other solutions include using a metal beam, or a 2 x 6 laminate beam. (see fig. C)
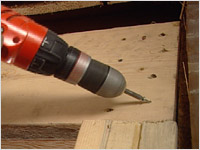
- Place the beam on top of the column supports and screw into place. (see fig. D & E)
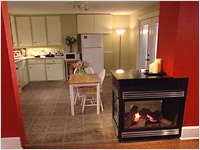
- All that’s left is the finishing work and the enjoyment of the new view. (see fig. F)
 |
|
 |
| Fig. E |
|
Fig. F |

| Building Materials, and Sico paint |
|
BMR/Builders Warehouse
3636 Innes Rd.
Orlean, ON K1C 1T1
p. 613-824-2702
|
Three sided fireplace, Napoleon brand BGD 40 N-3
|
|
Fireplace Center and Patio Shop
811 Boyd Ave.
Ottawa, ON K2A 2C8
p. 613-728-1775
|
Three sided fireplace, Napoleon brand BGD 40 N-3 (manufacturer) available at Fireplace Center and Patio Shop. For other locations, please check their website
|
|
Napoleon Fireplaces/Wolf Steel
|
| Granite for the Fireplace |
|
Emerald Tile
2878 Sheffield Rd.
Ottawa, ON K1B 3V9
p. 613-738-7841
|
|
|
|