| | | | |
| |


|
|
Moving your laundry upstairs saves you hours of time that you would otherwise spend running up and down stairs. But take the time at the outset to do it right. You don’t want leaks.
 |
 |
 |
 |
 |
 |
|
 |
DO call a professional plumber and electrician to help make the right connections.
|
 |
DON’T place your washer and dryer until proper waterproofing is installed on the floor.
|
|
 |
 |
 |
 |
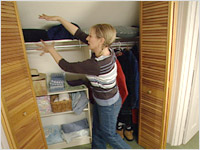
- Start by planning the location of your new laundry room. Plan to accommodate your washer and dryer, a soaking tub and some extra shelving for storage of detergents, bleaches and your iron. It’s best if it’s close to existing plumbing. Brigitte enlarged a blah linen closet to transform it into a fully functional state-of-the-art laundry system. (See fig. A)
- Brigitte opted for a new General Electric front-loading washer (saves water and detergent, and doesn’t eat clothes!) and dryer that stacked on top. But if your washing machine doesn’t chew your lucky shirt, you can stick with what you’ve got.
- Once you’ve laid out your plans you can follow Brigitte’s lead and become “Destructo Girl.” She doesn’t save people; she doesn’t come to the rescue; she DESTROYS things.
 |
|
 |
| Fig. A |
|
Fig. B |
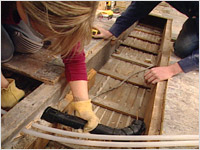
- Floor preparation is key. You need to lift up any current flooring in the area to make a path for plumbing connections. You also need to create a “well” for the laundry room floor. This “well” is lined with waterproof membrane to prevent your wash water from dripping into your soup simmering on the stove in the kitchen below.
- Once the floor has been excavated, the plumber can do their work. You need connections for the washer and the soaking sink as well as a drainage pipe for both. (see fig. B)
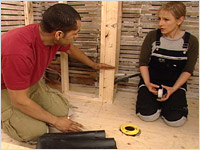
- Finish any wood framing that needs to be done in the area but don’t do the drywall yet. (see fig. C)
 |
|
 |
| Fig. C |
|
Fig. D |
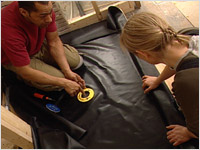
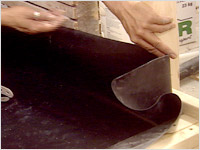
- You can now line the entire floor with a rubberized waterproof membrane. This will catch any water should your washer back up and flood the area. The membrane needs to cover the floor and run up the wall by six to eight inches. (see figs. D & E)
- Work carefully around the drainpipe. Remove the cap and place the membrane over the opening. Make small “Xs” just big enough for the screw heads to fit through. Wiggle the membrane over each screw and then place the cap and tighten. You need to cut the membrane once the work is done to allow the water to drain through the opening.
 |
|
 |
| Fig. E |
|
Fig. F |
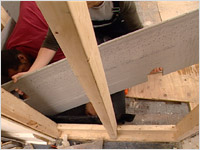
- With the membrane in place, you now can install 2-foot widths of cement board around the bottom of the wall and behind the area where the sink and washer will go. Cut the cement board to fit and screw it into place. Be sure not to puncture the membrane with screws. Place them higher on the 2 x 4 than where the membrane ends. (see fig. F)
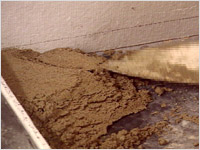
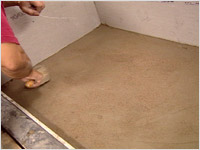
- Portland cement is next. It creates a scratch-coat for the installation of your tiles. You will be sloping the floor from the outside edges to the drain. Mark a line 1 ½ inches high around the perimeter of your “well.” Mix the cement according to package instructions. (If you squeeze a handful and it stays in a crumbly dry ball, it’s the right consistency.) Start from the outside of the wall and work your way to the drain. Use a trowel to smooth the cement, creating a smooth slope downwards to the drain. (see figs. G & H)
 |
|
 |
| Fig. G |
|
Fig. H |
- Let the cement set and you are ready to tile. This is not a difficult task because the floor prep is already done.
- Do a dry-fit with your tiles first, cutting them to fit. Use a notched trowel to spread the mortar, working in small areas. The ridges in the trowel control the amount of mortar so that you end up with just the right amount.
- Place your tiles and let set.
- Clean out any mortar between the tiles and vacuum up any debris. Prepare the grout. Mix grout at a low speed. You don’t want to “whip” it because air will compromise the strength of the grout.
- Using a grout float, draw the grout across the tiles in one direction and then back again in the opposite direction. This makes sure the gap is filled evenly on both sides.
- Gently pass a damp sponge over the joints to give them a smooth appearance. Use this same damp sponge to remove extra grout from the top of the tiles before it hardens.
 |
|
 |
| Fig. I |
|
Fig. J |
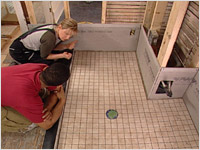
- Let dry for 24 hours. To slow down the curing process and create a stronger grout, spray the area with water twice a day for three days. (see fig. I)
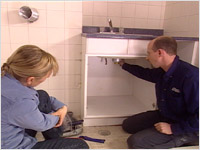
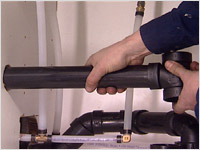
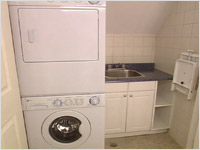
- You now ready to place the washer and dryer, connect the soaking sink and tackle the laundry that’s been piling up while you’ve been working. Wait a minute; didn’t you have two red socks? Where’d the other one go…? (see figs. J, K, L)
 |
|
 |
| Fig. K |
|
Fig. L |

| Building Materials, and Sico paint |
|
BMR/Builders Warehouse
3636 Innes Rd.
Orlean, ON K1C 1T1
p. 613-824-2702
|
| General Electric stackable washer and dryer |
|
Universal Appliances
1915 Bank St.
Ottawa, ON K1V 8A2
p. 613-521-5002
|
General Electric stackable washer and dryer (manufacturer) available from Universal Appliances.
|
|
General Electric
|
| Tiles and supplies |
|
Olympia Tile
2480 Don Reid Dr.
Ottawa, ON K1H 8P9
p. 613-736-9570
|
|
|
|