| | | | |
| |

|
|
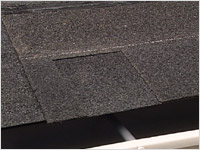
Brigitte knew that it was time for new shingles when she could crumble the old ones with her bare hands! Other signs of a dying roof are seams that curl up or widen at the bottom and granular bits that can be brushed off with your fingertips. A dripping sound in your living room could also be a tip-off.
 |
 |
 |
 |
 |
 |
|
 |
DO check the weather.
|
|
DON’T start work without proper safety gear. If working on a rough higher than 3 meters, you need a “fall arrest system.” You wear a harness that attaches to a fall arrest line that is fastened to the roof. It takes the heebie-jeebies out of your stomach and avoids any untimely deaths.
|
|
 |
 |
 |
 |
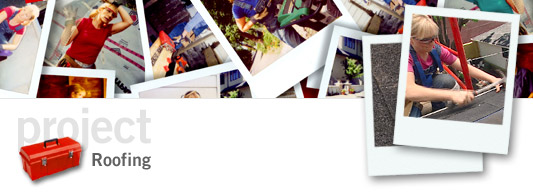
A Staggering Course in Roofing
Most roofing jobs are straightforward, as long as you’re not afraid of heights. Once the preparation work is done, placing the shingles is as easy as playing with building blocks.
Roofing Made Easy:
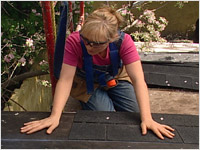
- Make sure that you have a safe way to get up and down from the roof. Rent a ladder stabilizer OR, if you’re like Brigitte, you can sweet talk the construction crew working next door into erecting scaffolding at your house! (see fig. A)
- Rent a bin to dispose of all of the old shingles and tarpaper. Be sure to place the bin in an area where it is easily accessible for tosses from the rooftop.
- It’s a good idea to cover any plants or flowers with plastic and place plywood boards in any windows that aren’t protected by eaves or overhangs.
 |
|
 |
| Fig. A |
|
Fig. B |
- Make sure you drink plenty of water. Being on a roof with black tarpaper and shingles is hot work. And use a good moisturizer and sunscreen. Hydration is so important!
- If possible, work while the trees are in bloom and plan your wardrobe accordingly.
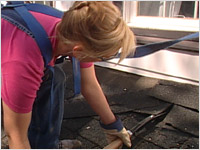
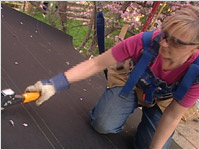
- This is always the fun part. Using a roofing shovel (a thin shovel with a flat end,) remove all the old shingles and tarpaper. Did you put that bin in the right place? (see fig. B)
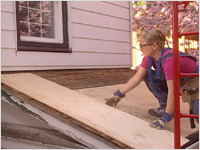
- Once the roof is bare, examine the roofing boards. If they’re rotten, they’ll need to be replaced. If not, cut pieces of ½ inch plywood sheeting to fit and nail in place. This provides an even work surface for the new roofing materials. (see fig. C)
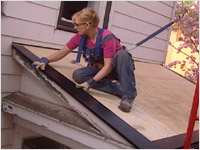
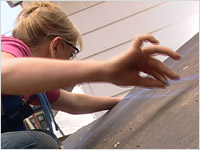
- The next step is to install a “drip edge” around the edges. This protects the cut edge of the plywood and encourages water flow into the eaves trough. (see fig. D)
 |
|
 |
| Fig. C |
|
Fig. D |
- Take a water break – you must be thirsty by now.
- Now you need to decide: tarpaper or waterproof membrane. If the roof is over an area that doesn’t conduct heat (like a porch) or if you don’t live in a cold climate, tarpaper is all you need. But if the roof is on a house in a cold climate, waterproof membrane protects against leaks caused by ice dams.
- Roll out the tarpaper or waterproof membrane, being certain to overlap each “course,” or pass across the roof. Nail into place. (see fig. E)
- It’s time to get the shingles started. Be careful, bringing them up to the roof. They’re heavy.
- To make sure that your shingles are straight, snap a chalk line to be your guide for the starter strip. (If the manufacturer doesn’t provide a starter strip, cut the tabs off of some shingles to use as a starter strip.) (see fig. F)
 |
|
 |
| Fig. E |
|
Fig. F |
- You want to make sure that the joints of the shingles are staggered. Cut 6 inches off of the first shingle in the starter strip before placing it. This sets up the placement of the joints so that subsequent rows will be staggered. Complete the starter strip along the length of the roof, being sure to allow a 1-inch overhang over the lip of the eave. This provides that little bit of extra support to the first row of shingles. (see fig. G)
- Now you can begin laying the shingles. Place the first “course” or row over the starter strip. (If you lift the first shingle, you can see why we cut 6 inches off the starter strip – the joints are now staggered.) (see fig. H)
 |
|
 |
| Fig. G |
|
Fig. H |
- Use 4 nails per shingle.
- Continue to snap chalk lines for each row so that the work continues to be straight.
- Time for another water break. Hydration, hydration, hydration.
- Place the first shingle in each subsequent course 6 inches over from the row below. The results are staggering! (see fig. I)
- When the entire roof is shingled, complete the job by installing flashing around vents, chimneys and roof junctions.
- Now your roof is ready to take on the elements. And you’re ready for a hot bath, that good moisturizer and maybe a manicure? (see fig. J)
 |
|
 |
| Fig. I |
|
Fig. J |

Coordination of roof, roofing and insulation contractors, material and supplies
|
|
Direct Energy Essential Home Services
1-800-266-3939
|
Authorized renovator for Direct Energy, roofing labour, equipment
|
|
Restore-All Corporation
7725 Flewellyn Road,
Stittsville, ON K2S 1B6
613-836-7454
|
Shingles (manufacturer)
|
|
GAF Materials Corp.
|
Authorized renovator for Direct Energy, insulation, labour
|
|
O’Reilly Brothers
55 Capital Dr.
Ottawa, ON K2G 0E7
613-224-1677
|
Waste removal
|
|
1-800-GOT-JUNK
|
Cherry picker, rental equipment
|
|
United Rentals
2660 Sheffield Rd.
Ottawa, ON K1B 1E6
613-745-3060
|
Weathervane
|
|
Swen Weathervanes
PO Box 44
Gardner, MD 58036
701-484-5734
|
|
|
|