| | | | |
| |

|
|
Chrome, leather, the roar of a Harley and… porcelain floor tiles and warm toes? They don’t always go together but they’re a perfect fit in Brigitte’s world. To install your own tile with professional results prepare the surface properly, measure carefully and don’t rush the job. Oh, and making motorcycle revving sounds while you work helps too.
 |
 |
 |
 |
 |
 |
|
 |
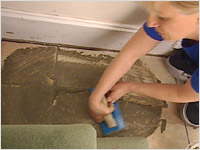
DO have fun removing the old flooring. All you need is a crowbar, a sledgehammer and the “willingness to beat the snot out of it,” as Brigitte would say.
|
|
DON’T install new tile over inadequate sub floor. If the surface is rough, install ¼ inch plywood underlay to provide an even work surface.
|
|
 |
 |
 |
 |
There’s Mortar Tile than Meets the Eye
Brigitte wanted the chic gleam of marble for her foyer. But marble doesn’t stand the abuse thrown at it by an entrance with direct exposure to the outside. Porcelain tile is much more durable and doesn’t require any maintenance.
Brigitte also wanted to have warm toesies when coming in from our cold northern winters. She decided to install a Nuheat electric radiant floor heating mat under her new tiles.
Tips for professional tile:
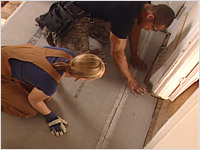
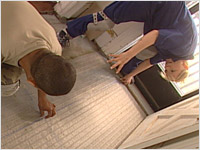
- Once the plywood underlay is in place, it’s time to install the cement backer board. Cement does not expand or contract with variations in weather (like plywood) and it provides a more stable surface for the tile. The cement backer board should be placed perpendicular to the sub floor for extra support. (see fig. A)
- To cut the cement backer board, score it with a utility knife and a straight edge. Place the end of the board over the edge of a workbench or table and snap off the extra portion. For more intricate cuts use a grinder with a cement-cutting wheel.
- Dry fit the backer board to be sure it fits. Leave a 1/8-inch gap between pieces to allow for tape and mortar joints.
 |
|
 |
| Fig. A |
|
Fig. B |
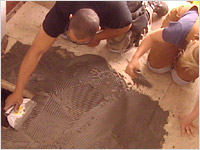
- Lift out the board and prepare the mortar according to package instructions. If you have a special mortar-mixing paddle, it’s especially cool. Let the mortar (about the consistency of thick oatmeal) stand for 15 minutes.
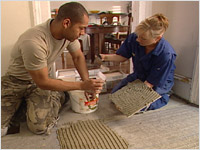
- Apply the mortar to the plywood using a notched trowel. The ridges in the trowel control the amount of mortar so that you end up with just the right amount. (see fig. B)
- Lay the pre-cut backer board in place and secure with stainless steel screws with countersinking heads.
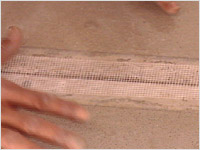
- Fill the joints with thin set mortar and cover with an alkali resistant tape (to prevent erosion.) Smooth over the joints with more thin set so that there is an even surface throughout. (see fig. C.)
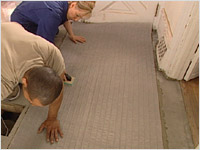
- When the mortar is dry, now is the time to dry fit a heating mat, if you choose to install one. (see fig. D)
 |
|
 |
| Fig. C |
|
Fig. D |
- Prepare more thin set mortar. Apply it in manageable sections so that it doesn’t dry and roll out the heating mat on top.
- Coat the whole area with one more layer of thin set mortar and let dry overnight.
- Call the electrician! Be sure the heating mat is connected and that it will work before you apply the tile on top. Don’t leave it turned on though. The tile grout needs to be dry at least a week before the heating mat can be used.
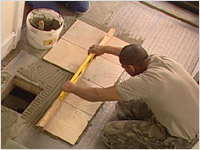
- Now you’re ready for the tile. Measure to find the exact centre of the area to be tiled. Snap a chalk line. Continue to measure carefully, creating a grid pattern of chalk lines so that the tiles will be square. (see fig. E)
- Dry fit the tiles according to the chalk lines to make sure that your work is square and that the tiles will fit.
- More mortar! By now you’re a pro at mortar mixing.
 |
|
 |
| Fig. E |
|
Fig. F |
- Do the tile work in quadrants. Brigitte worked in an area of four tiles at a time. You don’t want the mortar to dry before you get the tile in place.
- Spread the mortar out on the first quadrant. “Back butter” the tiles, which means to apply a thin layer of mortar to the back of the tile. This prevents tile breakage due to air pockets and creates a stronger bond. Place the tiles according to the chalk lines. Continue working in quadrants until all the tiles that can be installed without cutting are in place. (see fig. F)
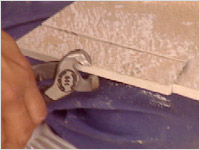
- Take a break now because you’ll need to get out the tile cutter and the “nipper.” The tile cutter works wonderfully for straight cuts. The nipper is a little trickier but you’ll need it for the finicky work. Measure the tiles that need to be cut and shape them according to the space you need to fill. (see fig. G)
- It’s okay to curse when the tiles break in the wrong place.
- Install these tiles and then let stand overnight (a minimum of 16 hours) to get ready for the grout. (see fig. H)
 |
|
 |
| Fig. G |
|
Fig. H |
- In the morning, clean out any mortar between the tiles. (Not too deep if there’s a heating mat in place – you don’t want to cut that.) Vacuum the debris and then wipe the tiles clean.
- Mix grout at a low speed. You don’t want to “whip” it because air will compromise the strength of the grout.
- Using a grout float, draw the grout across the tiles in one direction and then back again in the opposite direction. This makes sure the gap is filled evenly on both sides. (see fig. I)
 |
|
 |
| Fig. I |
|
Fig. J |
- Gently pass a damp sponge over the joints to give them a smooth appearance. Use this same damp sponge to remove extra grout from the top of the tiles before it hardens. (Brigitte says “Don’t use your husband’s toothbrush like I did!)
- Let dry for 24 hours. To slow down the curing process and create a stronger grout, spray the area with water twice a day for three days.
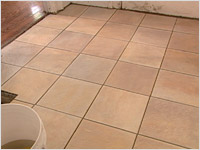
- When a week has passed, you can turn on the heating mat and feel glorious warmth radiate through the tiles. Mmmmmm… (see fig. J)

Motorcycle, location, wardrobe, extra, etc…
|
|
Freedom Harley- Davidson
1450 Merivale Rd,
Nepean, ON K2E 5P1
613-228-9449
|
Tiles, supplies, location
|
|
Olympia Tile
2480 Don Reid Dr.
Ottawa, ON K1H 8P9
613-736-9570
|
Under-floor heating in the foyer
|
|
The Electrical & Plumbing Store
31 North Side Road
Ottawa, ON K2H 8S1
613-721-2116
|
Under-floor heating mat (manufacturer)
|
|
Nuheat
|
Electrical Inspector
|
|
Electrical Safety Authority
1-877-372-7233
|
Scooter
|
|
Wheelsport Orleans
1390 Youville Dr.
Orleans, ON K1C 2X8
613-841-9400
|
|
|
|