| | | | |
| |


|
|
An essential part of a functional workshop is proper tool storage. You need to know where they are and be able to reach them easily. A pegboard storage system works beautifully. Now, a plain pegboard will do the trick, but why be ordinary? Planning your tool layout and painting sections to mark different areas for different tools works even better.
I’ve Got You Pegged
Smo-o-o-o-o-o-th. A gleaming finish on your hardwood floor requires a gentle touch and a lot of patience.
- Before you begin, make an inventory of the tools that you want to hang on your wall for easy access. On paper, draw a plan of where you would like each tool to hang.
- Pegboard can be purchased at any building supply centre. While you’re picking up the pegboard, buy the hooks that you need for each different kind of tool.
 |
|
 |
| Fig. A |
|
Fig. B |
- If necessary, cut the pegboard to the required size for your workspace. Apply a coat of primer. (see fig. A)
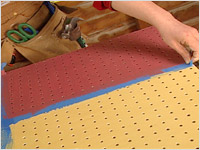
- Using painter’s tape lay out the different sections according to your original plan. (see fig. B)
 |
|
 |
| Fig. C |
|
Fig. D |
- Using a variety of colours (ones that you like and that complement each other, of course) paint each section. Lift the painter’s tape while the paint is still wet. (see fig. C)
- When the paint is dry, hang the pegboard on the wall and place your tools. (see fig. D)
- You have achieved pegboard perfection.
|
|