| | | | |
| |

|
|
Brigitte wants her workshop to be comfortable all year round - winter is a great time to work on inside projects while everything’s covered with snow outside. Insulation is a must.
 |
 |
 |
 |
 |
 |
|
 |
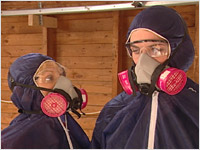
DO wear a breathing apparatus and cover all skin.
|
|
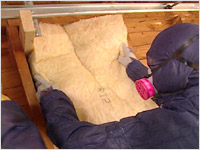
DON’T jam the insulation into the spaces. You don’t want to squish it or you will diminish the insulating properties.
|
|
 |
 |
 |
 |
Snug as a Bug in a Workshop
Okay, insulating is a job that nobody looks forward to. But the time you invest in properly insulating a workspace pays off in years of comfort.
- When you have a breathing apparatus in place and have covered exposed skin, you’re ready to cut open the packages of insulation with a utility knife. Poof! You get to watch the insulation magically expand. (Come on now, that’s fun, isn’t it?) (see fig. A)
- Take the first piece of insulation and snug it gently in between the studs. Careful not to squish it. (see fig. B)
 |
|
 |
| Fig. A |
|
Fig. B |
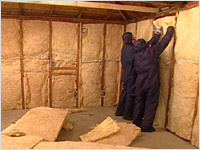
- Repeat that step over and over until you fill all the spaces between all the studs. Insulation can be cut to fit odd-shaped spaces. (see fig. C)
- For ceilings and other areas off the floor, you may need to use some thin rope or bands to hold the insulation in place temporarily.
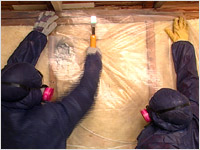
- Bring out the vapour barrier. This prevents warm air from getting between the insulation and the wall. This would create, moisture, condensation and then a whole lot of other problems that you want to avoid. (see fig. D)
 |
|
 |
| Fig. C |
|
Fig. D |
- Using a hammer tacker, attach the vapour barrier along the top and down the length of the 2 x 4 studs. Cut the vapour barrier pieces extra long so that an extra three to four inches extends out on to the floor.
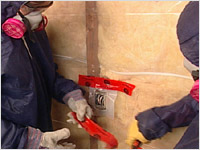
- Seal all the seams with vapour barrier tape. (see fig. E)
- You have now achieved a workshop that is cool in the summer and warm in the winter. Bravo! Now you need to make it look nice.
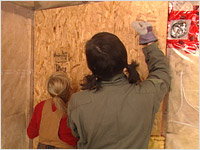
- Brigitte covered her walls and ceiling with chipboard. It’s inexpensive and less hassle than drywall. It also matches well with the DriCore floor she installed.
 |
|
 |
| Fig. E |
|
Fig. F |
- Before you install the wall covering of your choice, use a magic marker to mark the location of the studs on the extra vapour barrier that extends out on to the floor. This saves you the frustration of trying to locate the studs later.
- Nail the boards in to place, working your way around the perimeter. (see fig. F)
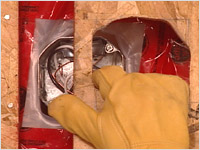
- Use a jig saw to cut holes for electrical boxes and windows. Measure and mark area to be cut on the board. Drill a hole large enough to accommodate the jigsaw blade in the middle of the area. Insert the jig saw blade and then it’s easy to cut the right hole, the right shape. (see fig. G)
 |
|
 |
| Fig. G |
|
Fig. H |
- When all the boards are in place, the hard part is over. Apply any finishing touches, have the electrician do any final wiring work, have the electrical work inspected and then your own personal Valhalla is ready to go. (see fig. H)
|
|