| | | | |
| |

|
|
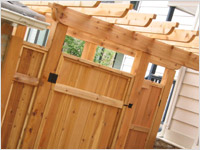
There are many different ways to build a fence and gate combination. Brigitte chose to give her fence a “picture frame” look. It provides complete privacy with a welcoming appearance.
 |
 |
 |
 |
 |
 |
|
 |
DO select the wood for this project carefully. You need straight boards so that the gate opens smoothly.
|
|
DON’T forget to consider which way the gate should swing before you start. You need to decide what will be most functional for daily use.
|
|
 |
 |
 |
 |
The Gateway to Good Fencing
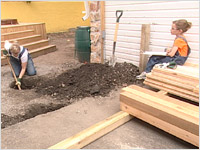
- Any good fence starts with good support posts. Brigitte already had placed the support posts for her fence and gate when she built her pergola. But, if you’re starting to erect a fence from scratch, digging the holes for the posts is the first step. (see fig. A)
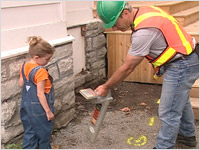
- But before you do this, call the local utilities to mark the location of gas, phone, electrical and water lines. Each province has a central number to call that checks for most of the utilities. Please CALL BEFORE YOU DIG! (see fig. B)
 |
|
 |
| Fig. A |
|
Fig. B |
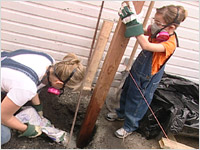
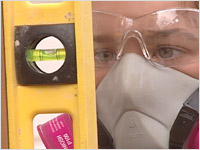
- Place the support posts in the hole and fill with Quick Cement. It can be harmful to breathe in the cement dust so wear protective breathing filters. Follow the product instructions to add the appropriate amount of water. (see fig. C)
- Use a level to make sure that each post is straight. (see fig. D)
 |
|
 |
| Fig. C |
|
Fig. D |
- Why did the Hairdo get sent to the corner? (a.) Because it was knotty!
- Using a line level, mark where the top and bottom of the fence rails will be. It is very important that these lines be level so that the fence is straight and the gate functions properly. Be sure to leave enough space at the bottom so that the gate will swing freely and not get caught on the grass or the ground.
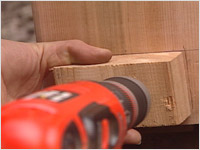
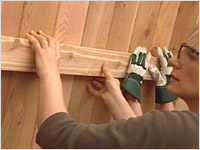
- Starting at the bottom of the fence, take two small pieces of wood and screw one into each support post below the level mark, touching the line. These give extra support to the fence rails. (see fig. E)
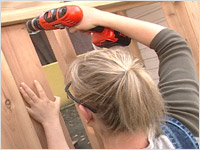
- Place the bottom fence rail on top of these wood supports and screw into place. “Toenail” (put the screw in on an angle) a screw into the support posts as well, for extra strength. (see fig. F)
 |
|
 |
| Fig. E |
|
Fig. F |
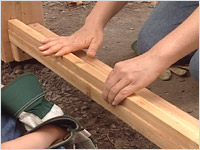
- 9 It’s time to install the “framing” piece on the bottom. Screw a 2 x 2 piece of wood along the edge of the bottom fence rail. The fence boards will be screwed into this later. (see fig. G)
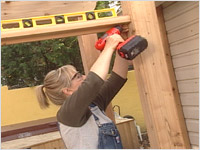
- You’ll need a similar “framing” piece for the top fence rail as well but for the top rail, it’s easier to attach it first. Screw the 2 x 2 “framing” board along the edge of the top fence rail. (see fig. H)
 |
|
 |
| Fig. G |
|
Fig. H |
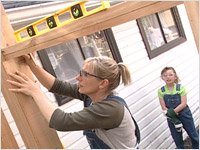
- Line the completed top fence rail up with the level line you have marked on the support post and “toenail” the fence rail into place. (see fig. I)
- Time for the fence boards. Tuck the straight boards snugly into position and screw into place along the bottom and top framing pieces. (see fig. J)
 |
|
 |
| Fig. I |
|
Fig. J |
- Install a cross-brace for extra strength. (see fig. K)
- Finish the “framed” appearance by installing 2 x 2 pieces of wood around all the outside edges. Mitre the corners to a 45 angle for a professional look. (see fig. K)
- Brigitte built her fence and gate using the same method so that the appearance would be uniform. The only difference is, the gate is built separately and then installed on hinges later.
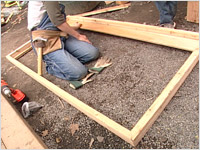
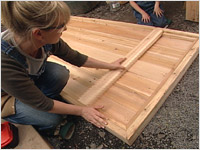
- Measure the boards for the sides, top and bottom of the gate carefully. They need to be exact or they won’t be symmetrical or function smoothly. Screw these boards together to create the outer shape of the gate.
 |
|
 |
| Fig. K |
|
Fig. L |
- Install the 2 x 2 framing pieces at the top and the bottom as before. (see fig. L)
- Screw the fence boards into place. Install the cross brace and frame as before. (see fig. M)
 |
|
 |
| Fig. M |
|
Fig. N |
- When the gate is complete, attach the hinges and install on to the support posts so that the gate swings in the appropriate direction.
- Attach the latch hardware.
- Woo-hoo! Snack time. (see fig. N)
|
|