| | | | |
| |

|
|
Cork flooring is an excellent choice for many applications. It’s durable, non-allergenic, unaffected by humidity and it even dampens sound. Each cubic inch of cork flooring has more than 2 million air pockets making it soft and comfortable for Brigitte to step on first thing in the morning. It doesn’t transfer heat so it’s warm in the winter and cool in the summer.
 |
 |
 |
 |
 |
 |
|
 |
DO bring the cork panels into the area where they will be used 48 hours prior to installation. The cork needs to “acclimatize” to the room.
|
|
DON’T worry about glues, contact cement or mortars. The rough cork on the back of the floor panels holds it in place – another plus for those with allergies.
|
|
 |
 |
 |
 |
Snap and Lock the Cork
- You want to have an even surface on which to lay the cork flooring. Install plywood underlay over the entire floor area. (see fig. A)
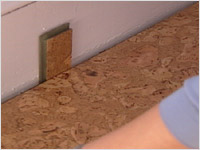
- Cork flooring comes in panels that snap and lock together for easy installation. Place the first panel in position leaving a small gap between the panel and the wall for expansion. (This gap will be covered by the quarter round later.) Brigitte used some small scraps of the cork flooring placed against the wall to make the gap uniform the entire length of the panel. (see fig. B)
 |
|
 |
| Fig. A |
|
Fig. B |
- Continue to run the first row of cork panels along the wall, snapping the ends together. (see fig. C)
- When beginning the second row, the first piece should be cut in half so that the joints of the panels will be staggered for extra strength.
- You want to make sure that each panel is securely locked into position against the previous piece, leaving no gaps. Sometimes this requires a little gentle “persuasion.” Place a 2 x 4 against the outer lip of the panel to be fitted and gently hammer against the 2x4 until the pieces are securely locked together.
 |
|
 |
| Fig. C |
|
Fig. D |
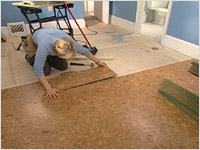
- Keep “snapping and locking” until the entire floor area is covered. The panels can be easily cut to fit in difficult corners and odd-shaped areas. Just be sure you cut the side that locks with the piece already laid. (see fig. D)
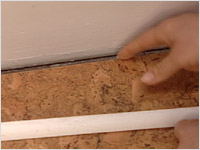
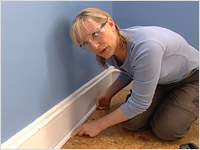
- Finish the edges with quarter round and you have an attractive, durable floor that lasts for decades. (see figs. E & F)
- You can “pop” a cork now if you want…
 |
|
 |
| Fig. E |
|
Fig. F |

| Closet design, materials, and supplies |
|
California Closets
1373 Greene Avenue
Westmount, QC H3Z 2A9
514-636-6336
|
| Cork flooring, window treatments, and supplies |
|
Westboro Flooring
195 Colonnade Rd. S
Ottawa, ON K2E 7K3
613-226-3830
|
"Solida" cork flooring (distributor) available at Westboro Flooring and Décor , or check their website for other locations across Canada
|
|
Eraco International
905-712-9976
|
| Scaffolding, jacks |
|
Access Rigging
163 Walgreen Rd,
Carp, ON K0A 1L0
613-831-1103
|
| Paint, etc. |
|
Randall’s paint
555 Bank St.
Ottawa, ON K1S 5L7
613-233-8441
|
|
|
|