| | | | |
| |


|
|
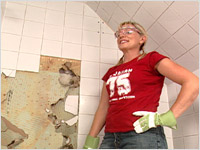
Brigitte and her dog, Torchy Peden, are the stars of a dog food ad campaign so they need to look professional, polished, relaxed. They need a spa treatment. They need a spa shower to replace the old, inadequate (teeny-tiny) bathtub.
 |
 |
 |
 |
 |
 |
|
 |
DO think “luxury” when planning a spa shower. Brigitte opted for four incredible, body-stimulating body jets in her plans. Now THAT’S luxury.
|
 |
DON’T use mortar with latex in it. It won’t dry properly.
|
|
 |
 |
 |
 |
A Shower You Can Really Sing About
- Before you begin the installation of a new spa shower, the area has to be prepared properly first. You need to remove any existing drywall. (You get to use a sledgehammer. Yes!) Rough in the plumbing for all your amazing new water fixtures. Install a new plywood subfloor and make sure that it is level. (see fig. A)
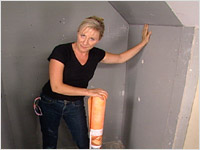
- The first step is installing the new drywall. Mark the openings for faucets and shower heads. (see fig. B)
 |
|
 |
| Fig. A |
|
Fig. B |
- Once your drywall is done, you cover it with the Schluter Shower System, a sheet applied waterproof membrane system. That creates a waterproof barrier between the drywall and the tile. Your mantra when creating a shower space should be, “Waterproof, waterproof, waterproof.” Water is an amazing substance. If it finds even the smallest entry point into a wall, it seeps through and creates havoc.
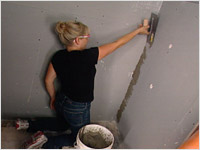
- Prepare some latex-free mortar to use to apply the waterproof membrane. The mortar should be mixed to the consistency of wet oatmeal. Get used to mixing mortar. You use a lot of it for this project! (see fig. C)
 |
|
 |
| Fig. C |
|
Fig. D |
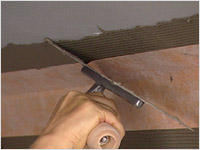
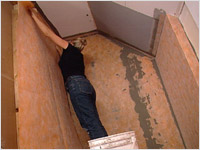
- Starting in the corners, use a notched trowel to apply a layer of mortar to the drywall. Apply the strip of waterproof membrane. Use the flat edge of the trowel to press the membrane into place and remove any air bubbles. Seal the edges with mortar. When the corners are finished, apply more mortar to the larger wall surfaces and apply the sheets of waterproof membrane. It’s kind of like hanging wallpaper. Seal the edges with mortar and let set for 24 hours. (see figs. D & E)
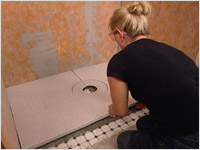
- Brigitte purchased a shower kit that included the “curbs” that hold the water in and a polystyrene shower floor. It can be cut to fit different shower shapes and it has a built-in slope for the floor so you don’t have to fuss with cement and angles and such. Dry-fit the polystyrene floor to your shower shape and mark the drain hole. Using your notched trowel again, apply a layer of mortar over the entire floor surface. Place the polystyrene floor and walk on it to set it. (see fig. F)
 |
|
 |
| Fig. E |
|
Fig. F |
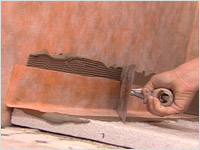
- Set the drain portion of the shower floor kit into place and use mortar to seal it. Apply thin strips of waterproof membrane around the bottom edges of the shower stall where the floor meets the wall. (see fig. G)
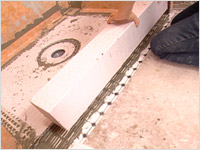
- Apply a layer of mortar to the outside edge of the shower stall and set the “curbs” in place. Seal with a strip of waterproof membrane. (see fig. H)
 |
|
 |
| Fig. G |
|
Fig. H |
- Now you need to cover the polystyrene floor with a layer of waterproof membrane. Apply a layer of mortar over the entire floor and press the waterproof membrane into place. Let set for 24 hours. (see fig. I)
- You’re now ready for the tiles. It’s always a good idea to dry-fit the tiles. You want to avoid having two cut lines on the same wall. And you want to place the cut lines in the least noticeable place.
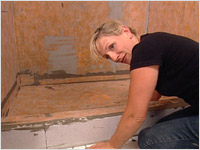
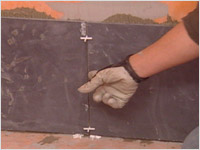
- Dig out your notched trowel again and apply a layer of mortar along the bottom row of the shower stall. Check for level. If your first row isn’t level then the whole wall won’t be straight! Continue to apply tiles doing all the ones that can be fitted without cutting first. Use spacers for evenness and to leave room for grout. (see fig. J)
 |
|
 |
| Fig. I |
|
Fig. J |
- To cut tiles to fit the odd-shaped corners and slopes, use a tile saw. Keep the reservoir full of water. It acts as a coolant for the blade. If you need to cut round holes in a tile to accommodate faucets, use an adjustable carbide hole drill. As the name suggests, it can be adjusted to make the right sized hole for your project. When using the hole drill, keep the tile and the bit area wet, just like when using the tile saw. The drill bit needs some coolant too.
- Once all your tiles are in place, let the mortar set for 24 hours and then apply the grout. Brigitte’s black grout matches her slate tiles. It looks amazing and is easy to keep clean. But grout can be bought in many different colours so choose the one that you works best for your project.
 |
|
 |
| Fig. K |
|
Fig. L |
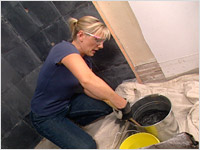
- Mix grout slowly. You don’t want to “whip” it because air will compromise the strength of the grout. (see fig. K)
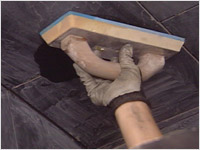
- Using a grout float, draw the grout diagonally across the tiles in one direction and then back again in the opposite direction. This makes sure the gap is filled evenly on both sides. You want the grout to be flush with the surface of the tile. And you don’t want any bubbles of gaps in your grout. (see fig. L)
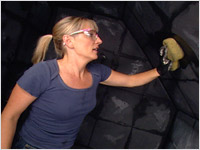
- Gently pass a slightly damp sponge over the joints to give them a smooth appearance. Wait 10 or 15 minutes for the grout to set slightly then use this same damp sponge to remove extra grout from the surface of the tiles. You have to do this before it hardens, especially on tiles with a variegated surface. Dried grout is extremely difficult to remove from all those little indentations. Be careful not to remove grout from between the tiles though. (see fig. M)
 |
|
 |
| Fig. M |
|
Fig. N |
- Work in small areas, applying the grout then removing it from the surface of the tiles. If you apply grout to too large an area, it might set too hard to be removed from the surface of the tiles by the time you get back to the beginning.
- Let dry for 72 hours. But you’ll have to do that anyway because you’ll have to wait for your custom-cut glass shower enclosure to arrive. You have to wait until the tiling is done before you measure and order because the fit has to be exact.
- While you’re waiting for your glass doors, install the fixtures and faucets. They give you something to dream about while you wait.
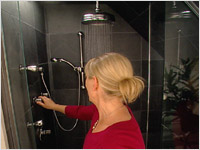
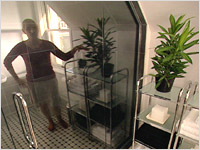
- Once your glass doors are in place, your spa shower will be the envy of the neighbourhood. Don’t be surprised if friends and neighbours come up with excuses to drop by and try it out…an at-home shower body massage. Now that’s living! (see figs. N & O)
 |
| Fig. O |

Waterproof membrane and shower floor (manufacturer). For locations, please check their website.
|
|
Schulter Shower System
|
| Shower Fixtures (supplier) |
|
The Electrical and Plumbing Store
31 North Side Road
Ottawa, ON K2H 8S1
613-721-2116
|
Shower Fixtures (manufacturer) available at The Electrical and Plumbing Store. For other locations, please check their website.
|
|
Natphil
|
| Tiles, grout, supplies and expertise. |
|
Olympia Tile
2480 Don Reid Dr.
Ottawa, ON K1H 8P9
613-736-9570
|
| Custom Glass Doors |
|
M&T Glass
1380 Cyrville Rd.
Ottawa, ON
613-745-7158
|
|
|
|