| | | | |
| |


|
|
Anthony may be “Mr. Moneypants” but he still appreciates beautiful simplicity. A baloney sandwich, fresh-squeezed lemonade, a fresh coat of paint...
 |
 |
 |
 |
 |
 |
|
 |
DO spend time preparing the walls properly. Paint adheres better to a clean surface.
|
 |
DON’T be shy about experimenting with colour. Make a statement with your paint.
|
|
 |
 |
 |
 |
Rollin’, Rollin’, Rollin’
- As with many projects, the difficult part of painting is the prep work. First, you need to buy the paint, rollers, dropcloths, brushes, and so on. If you can spare the extra money, buy good quality paint from a reputable dealer. First, the staff members at speciality paint stores are extremely knowledgeable and can answer any questions you may have. Second, good quality paint rolls on like a dream and doesn’t spatter.
- How much paint? It all depends on the size of your room (and the quality of the paint.) Most paints cover about 500 square feet per gallon. One gallon of paint is usually more than enough for an average-sized bedroom.
- Buy a roller with the right length of nap for your wall surface. Textured walls require longer nap.
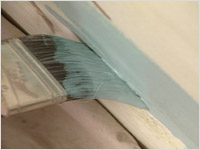
- Invest in a good tapered brush for cutting the paint along the ceiling or around windows. If you have a good quality tapered brush you should be able to paint clean edges without taping.
- Start by moving furniture out of the room or into the centre so that you can walk easily around the perimeter. Cover the furniture with drop cloths to avoid catastrophe.
- Remove artwork, lights, switch plates, outlet covers, etc.
- Wash the walls with TSP to remove any dirt and oily build-up. Rinse with clean water.
 |
|
 |
| Fig. A |
|
Fig. B |
- Examine the walls thoroughly for any holes or other imperfections. Apply spackling with a putty knife and smooth over. When the spackling is dry, sand it until it is even with the wall surface. Remove any dust from the area.
- If you are changing from a dark colour to a light colour, you may want to prime the wall first. Primer is less expensive than paint!
- Make sure that your work area is well ventilated.
- Stir the paint well.
- If you’re going to be painting the ceiling, start with this first. Wear safety glasses so that you don’t get drops of paint in your eyes.
- Use your tapered brush to paint the trim around the edges and around light fixtures.
 |
|
 |
| Fig. C |
|
Fig. D |
- Now you can start to roll the paint on to rest of the ceiling. Work in areas about one square meter in size. Fill the roller with paint and apply it in a “W” shape. Then go back and cover in the empty spaces. Move along the wall and work on the next metre-square area, blending the paint well with that of the previous section. Continue painting without stopping until you’ve covered the entire ceiling.
- When the ceiling is complete, start with the walls. Use the tapered brush to paint the top and bottom edges and the trim around windows and doors. If you are uncomfortable with the brush alone, you can apply painters’ tape to the trim areas. (see figs. A & B)
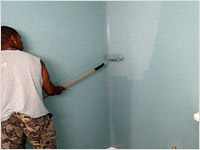
- Roll the paint on to the walls in the same “W” pattern, going back to fill in the empty spaces. (see figs. C & D)
- Apply the second coat as you did the first. Trim the edges and then fill in the larger wall space with the roller. (see fig. E)
- Clean your brushes immediately.
- Wait for the paint to dry thoroughly before reinstalling the switch plates and outlet covers.
- Your room now has a great new facelift. Consider rearranging your furniture while you’re at it. Or add a new lamp or throw pillow. Sometimes small things make a big difference.
 |
| Fig. E |
|
|