| | | | |
| |


|
|
Brigitte tore her kitchen down to the bare walls for her renovation plan. Goodbye lathe and plaster. Goodbye old door hidden in the wall. With her kitchen stripped to the basics Brigitte was able to properly insulate her century-old kitchen.
 |
 |
 |
 |
 |
 |
|
 |
DO wear a breathing apparatus and cover all skin.
|
 |
DON’T jam the insulation into the spaces. You don’t want to squish it or you will diminish the insulating properties.
|
|
 |
 |
 |
 |
Insulating Properties
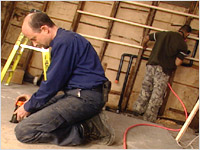
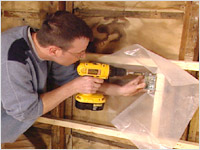
- Insulating can’t begin until proper framing is in place. Install any plumbing pipes. Run the electrical wires and install the outlet boxes. Be sure to place vapour barrier around the electrical outlets to prevent moisture build-up. Install any telephone or cable wires and boxes. (see figs. A & B)
 |
|
 |
| Fig. A |
|
Fig. B |
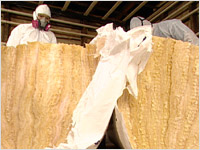
- When you have a breathing apparatus in place and have covered exposed skin, you’re ready to cut open the packages of insulation with a utility knife. Poof! You get to watch the insulation magically expand. (Come on now, that’s fun, isn’t it?) (see fig C)
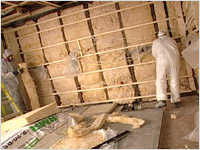
- Take the first piece of insulation and snug it gently in between the studs. Careful not to squish it.
- Repeat that step over and over until you fill all the spaces between all the studs. Insulation can be cut to fit odd-shaped spaces. (see fig. D)
 |
|
 |
| Fig. C |
|
Fig. D |
- For ceilings and other areas off the floor, you may need to use some thin rope or bands to hold the insulation in place temporarily.
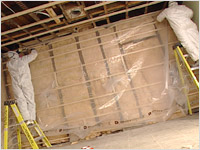
- Bring out the vapour barrier. This prevents warm air from getting between the insulation and the wall. This would create moisture, condensation and then a whole lot of other problems that you want to avoid. (see fig. E)
- Using a hammer-tacker, (this is much faster than hammer and nails) attach the vapour barrier along the top and down the length of the 2 x 4 studs. Cut the vapour barrier pieces extra long so that an extra three to four inches extends out on to the floor.
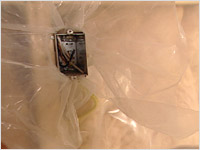
- Working around electrical outlets is a little tricky. Cover the outlet with vapour barrier. Make a small slit down the centre area – not too big. Gently work the smaller piece of vapour barrier (that was put in place around the outlet box) through the slit. Seal this plastic housing down with vapour barrier tape. (see fig. F)
 |
|
 |
| Fig. E |
|
Fig. F |
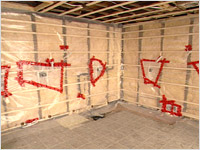
- Seal all the seams with vapour barrier tape. (see fig. G)
- Remove your breathing apparatus; take a deep breath and say, “Aaahh, a job well done.” Now you need to make it look nice. (see fig. H)
- Before you install the drywall, use a magic marker to mark the location of the studs on the extra vapour barrier that extends out on to the floor. This saves you the frustration of trying to locate the studs later.
- For detailed drywall instructions, see Episode #30 of Me, My House and I, “Handle Like Eggs.”
 |
|
 |
| Fig. G |
|
Fig. H |

| Building Materials, and Sico paint |
|
BMR/Builders Warehouse
3636 Innes Rd.
Orlean, ON K1C 1T1
p. 613-824-2702
|
| Kitchen design and location |
|
Astro Design Centre
1260 Old Innes Rd.
Ottawa, ON K1B 3V3
p. 613-749-1902
|
| Granite countertops and location |
|
Emerald Tile
2878 Sheffield Rd.
Ottawa, ON K1B 3V9
p. 613-738-7841
|
|
|
|