| | | | |
| |


|
|
A jazz band practice at a friend’s house leads Brigitte to enter a radio music contest AND install new French doors off her back patio. Only Brigitte! Luckily Anthony has a deft touch with drywall and an ear for music.
 |
 |
 |
 |
 |
 |
|
 |
DO remember Brigitte’s motto: Destruction is fun!
|
 |
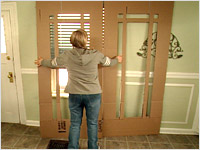
DON’T start cutting into your existing wall until you’re sure of the door placement. Brigitte made a cardboard door template to try out a few options before starting the destruction.
|
|
 |
 |
 |
 |
French Doors – Mais Oui!
- Decide on the type and the placement of your new doors. Make sure that you buy doors that swing in the direction that you want. Doors can swing either in or out.
- If you are replacing an existing sliding door, it’s easiest to measure the opening and buy your door according to the existing measurements.
- Once you’ve purchased the door, measure and mark the area on the wall where it will be installed. Then measure again. This is one step that you don’t want to mess up. (see fig. A)
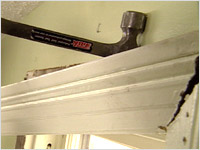
- Now the destruction can begin. And remember, destruction is fun! If there is an existing window or door in place, use a pry bar to remove the sills and trim then remove the window. (see fig. B)
 |
|
 |
| Fig. A |
|
Fig. B |
- Use a drywall saw or a circular saw to cut the opening for the door to the right size. Be careful of any electrical wiring or plumbing that might be in place in the walls.
- If you’re lucky, you can move on to the next step. In Brigitte’s case, her work led to the discovery that her 100-year-old house had no insulation in the walls! If this is the case, take the opportunity to reconstruct the wall and insulate properly.
- Measure the height of your new door. Mark that measurement on the edge of the opening so you’ll know where to place the header. To make the header for the width of Brigitte’s door opening, cut three pieces of 2 x 8 to the appropriate length and join together with screws. (The type of header will change depending on the width of the door opening.) “Toenail” the screws (that means insert them at an angle) for extra strength.
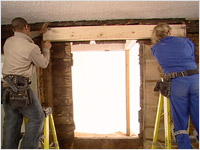
- Place the header (using a hammer for gentle persuasion if necessary) and screw into place. (see fig. C)
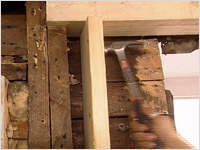
- Install 2 x 4’s on each side of the door opening to support the header and complete the frame. (see fig. D)
 |
|
 |
| Fig. C |
|
Fig. D |
- Dry fit the door to make sure that everything is going to fit properly. If there is a difference in height between the floor and the door, install a piece of wood to make it level.
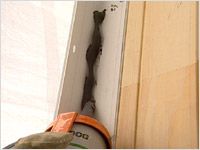
- Run a bead of acoustic seal along the threshold where the door will sit. Wrap the door in vapour barrier. Place the bottom of the door in position and then tilt the door into place. (see fig. E)
- Check to make sure the door is level and plum. If it is not level, it may not open properly. To make any corrections, install shims along the sides of the door. Test the door to make sure that it is functioning properly. (see fig. F)
 |
|
 |
| Fig. E |
|
Fig. F |
- Screw the door into place. Cut away any excess vapour barrier.
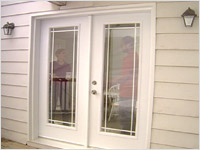
- You’re ready to start making it beautiful. Use spray foam insulation to insulate around the doors. The most important thing to remember when spraying foam is to close the doors first, so it expands evenly, keeping the door centred. Do any drywall repairs and install the trim. (see fig. G)
- Stroll through your new French door to take in the breezes. It is très belle, no? (see fig. H)
 |
|
 |
| Fig. G |
|
Fig. H |

| Building Materials, and Sico paint |
|
BMR/Builders Warehouse
3636 Innes Rd.
Orlean, ON K1C 1T1
p. 613-824-2702
|
| French doors |
|
Window Works
854 Boyd Avenue,
Ottawa, ON K2A 2E1
p. 613-728-0888
|
French door (manufacturer) available of Window Works. For other locations, please check their website
|
|
Bonneville Doors and Windows
|
| Lighting and electrics |
|
The Electrical & Plumbing Store
31 North Side Road
Ottawa, ON K2H 8S1
p. 613-721-2116
|
|
|
|