| | | | |
| |


|
|
By the time Brigitte finished her kitchen makeover she was brain-tired. She couldn’t face any more decisions about paint colour, or tile selection. She called in her friends and soon (several glasses of wine later) she had a white tumbled marble backsplash to pull together her kitchen design.
 |
 |
 |
 |
 |
 |
|
 |
DO measure and determine the centre before you start. You want to end up with even tiles on the edges or the whole project looks out of whack.
|
 |
DON’T drink too many glasses of wine before you start. (Right, Brigitte?) Save the celebrations for after your work is done.
|
|
 |
 |
 |
 |
Tile and the World Tiles With You
The backsplash area in the kitchen is often overlooked. Grab your trowel and get tiling to give your kitchen an attractive and durable finishing touch.
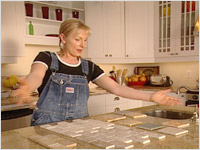
- There are several different types and sizes of tiles to choose from. Some tiles come individually; other smaller tiles come in sections already evenly spaced, attached to a net backing. These are much easier to work with. They also happen to be what Brigitte chose for her kitchen. (see fig. A)
- Whatever style and size you choose, measure the wall and determine the centre of the main focal point along that wall. For example, if there is a stove and range hood on the wall, the tiles need to radiate outwards from the centre of this open area over the stove. Many people even choose to place a special tile design in the centre of this area to draw the eye in that direction.
 |
|
 |
| Fig. A |
|
Fig. B |
- Place some protective covering over your counter to protect it from glue and grout.
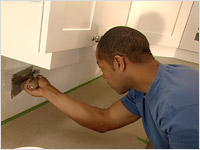
- Using a notched trowel, apply the tile glue to the surface smoothly and evenly, working in small sections. The notches in the trowel spread just the right amount of glue on to the surface. (see fig. B)
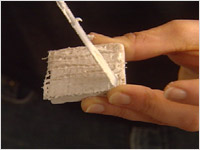
- Back butter the tiles. This means to apply a thin layer of glue to the back of the tile. This helps the tiles to adhere better to the wall and reduces the possibility of air bubbles. (see fig. C)
 |
|
 |
| Fig. C |
|
Fig. D |
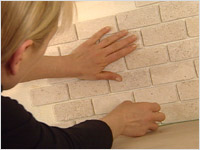
- You need to apply the tiles closest to the counter first. In other words, you’ll be working from the bottom up. Starting from your centre mark, place the tiles, twisting into position to ensure a good bond. Continue to work your way across the wall making sure to space the tiles evenly. “Tile spacers” ensure that you leave enough room for grout (but not too much) and that your spacing is even. (see fig. D)
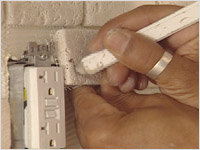
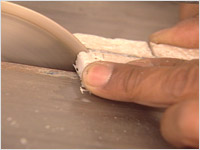
- If you need to cut around outlets or other obstacles on the wall, hold a tile in place around the outlet and mark where cuts need to be made. If the cut is straight, use a tile saw. Unusual shapes can be cut using tile nippers. (see figs. E & F)
 |
|
 |
| Fig. E |
|
Fig. F |
- Once all the tiles are in place, the next step is sealant. You will be sealing the tiles before and after grouting. Apply a coat of spray sealant to the tiles and let dry thoroughly.
- Now your tile backsplash is ready for grout. Grout fills in the spaces between the tiles and makes them impermeable to water. If you like, you can add a pigment to your grout. (Brigitte did.) This adds a touch of colour to the tile and is also much easier to keep clean. Grout is usually purchased as a powder and then mixed with water. Mix grout slowly. You don’t want to “whip” it because air will compromise the strength of the grout.
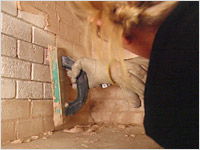
- Using a grout float, draw the grout diagonally across the tiles in one direction and then back again in the opposite direction. This makes sure the gap is filled evenly on both sides. You want the grout to be flush with the surface of the tile. And you don’t want any bubbles of gaps in your grout. (see fig. G)
 |
|
 |
| Fig. G |
|
Fig. H |
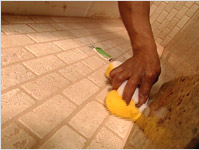
- Gently pass a slightly damp sponge over the joints to give them a smooth appearance. Wait 10 or 15 minutes for the grout to set slightly then use this same damp sponge to remove extra grout from the surface of the tiles. You have to do this before it hardens, especially on tiles with a variegated surface. Dried grout is extremely difficult to remove from all those little indentations. Be careful not to remove grout from between the tiles though. (see fig. H)
- Work in small areas, applying the grout then removing it from the surface of the tiles. If you apply grout to too large an area, it might set too hard to be removed from the surface of the tiles by the time you get back to the beginning.
- Let dry for 72 hours. To slow down the curing process and create a stronger grout, spray with water twice a day over the three days.
 |
|
 |
| Fig. I |
|
Fig. J |
- Apply a seam of silicone caulking around the perimeter of the counter top.
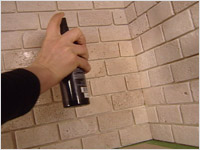
- Finish with another coat of grout sealant. (see fig. I)
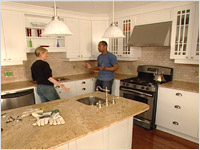
- NOW is the time to raise a glass of wine. A toast, to a professional-looking backsplash. (see fig. J)

| Building Materials, and Sico paint |
|
BMR/Builders Warehouse
3636 Innes Rd.
Orlean, ON K1C 1T1
p. 613-824-2702
|
| Tiles and supplies |
|
Olympia Tile
2480 Don Reid Dr.
Ottawa, ON K1H 8P9
p. 613-736-9570
|
|
|
|