| | | | |
| |

|
|
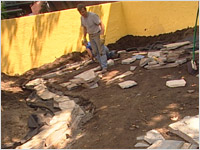
Sometimes it takes not-so-subtle hints from people like Theodore Teakettle to get us moving, especially when it’s a project that involves heavy lifting. But thanks to the mysterious visits from her well-meaning neighbour, and the added muscle power of her friend Murray, a meandering Scotia Slate stone wall now frames Brigitte’s new back garden.
 |
 |
 |
 |
 |
 |
|
 |
DO be careful lifting so as not to strain your back. Depending on the type of stone you choose, they can be very heavy. Enlist the help of dedicated friends, like Murray, or use wheelbarrows or carts if necessary.
|
|
DON’T make the mistake of using larger stones on the bottom layers of the wall and smaller ones on top. You want to vary the size and shape of the stones throughout the wall to create stability.
|
|
 |
 |
 |
 |
Stonedust Melodies
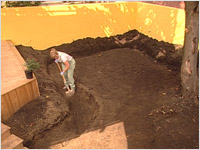
- Mark the area on the ground where you want to place the wall. Trace the shape in the dirt or mark it out with string, just so long as you see the actual size and shape of the wall in the actual location. This helps you to visual the finished product so that you know for sure what you want. It also helps you to get more accurate measurements to use when ordering the stones.
- Excavate the area to a depth of at least 6 inches. (see fig. A)
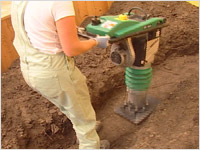
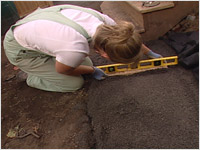
- Tamp the excavated area using a power tamper. (see fig. B)
 |
|
 |
| Fig. A |
|
Fig. B |
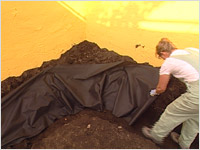
- Lay down a layer of landscaping cloth so that it runs up the sides of the trench where the back of the stone wall will be resting. The landscaping cloth prevents soil from seeping in between the rocks and destabilizing them. It also prevents weeds from growing up in between. (see fig. C)
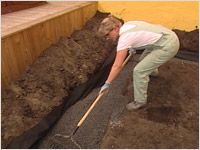
- Using a rake spread a layer of about 2 inches of gravel in the bottom of the trench. (see fig. D)
 |
|
 |
| Fig. C |
|
Fig. D |
- Tamp until you’re all “tamped out.”
- Fill the remainder of the trench with stonedust until it is level with the ground. Use a piece of wood and a level to smooth out the surface - this is called screeding. This is the solid level surface that serves as the foundation for the stone wall. (see fig. E)
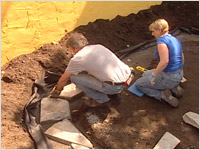
- You’re now ready to place the stones. Do one whole layer of the wall at a time - don’t work in sections. Vary the size and shape of the stones, fitting them together like a puzzle. (see fig. F)
 |
|
 |
| Fig. E |
|
Fig. F |
- Watch your back!
- When the first layer is complete, you can start on the second layer. Place each stone; testing to make sure that it is seated properly. You may need to try different stones in different areas until it feels right. You want to alternate the joints of the stones in each layer like you would if you were laying bricks. (see fig. G)
- Be grateful for good friends who come to help you do heavy work like this!
- If you’re tired, a wheelbarrow makes a great chair.
- As you build upwards to the desired height, fill in behind and between the stones with stonedust.
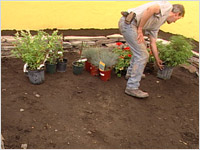
- Your stone wall is now complete! Enjoy – at least for a little while, before you start the gardening. (see fig. H)
 |
|
 |
| Fig. G |
|
Fig. H |
|
|