| | | | |
| |


|
|
 Previous Project | Installing Interlocking Stone Previous Project | Installing Interlocking Stone |
Project List  |
|
 |
Asphalt is boring! And not very hardwearing either. A beautiful spread of interlocking stone (properly installed) provides an appealing and durable welcome to your home.
 |
 |
 |
 |
 |
 |
|
 |
DO the prep work! You must excavate to the required depth and prepare a proper base for the stone or there will be a “wrinkle” in your work later.
|
 |
DON’T forget to provide your work crew with plenty of snacks and drinks. A hot tub is a bonus. |
|
 |
 |
 |
 |
We’ve Got it all Interlocked Up
- There are many different types and colours of stone available. Choose a style and colour that suits your home, your natural environment and the colour scheme of the surroundings. Brigitte’s beige-coloured tumbled stone reflects the historic nature of her community.
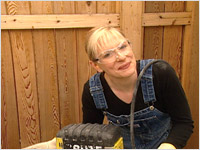
- Make way for your new stone! Take up all the ugly boring stuff that’s in place and get rid of it. Brigitte started with a jackhammer. (Always good for working out frustrations.) But her good friends came to her rescue and provided a backhoe with a front-end loader. The work goes much faster with the proper heavy equipment. (see fig. A)
 |
|
 |
| Fig. A |
|
Fig. B |
- It’s time to begin the preparation of the base for your stone. This is an extremely important step. It’s SO tempting to skip over this tedious, time-consuming part and get to the interesting stone laying but don’t do that! Your stone needs a firmly compacted, properly prepared base. Without it your stones may heave, separate or sink under the weight of your vehicles.
- You need to excavate to the depth required for the climate in your area. Brigitte’s colder climate requires an excavated depth of 12 inches. This allows for 8 inches of granular stone, 2 inches of stonedust and 2 inches for the interlocking brick.
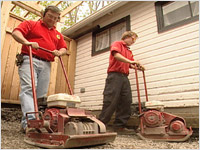
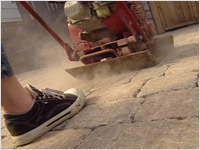
- Once the excavation is complete, level and tamp down the area using a power compactor. (see fig. B)
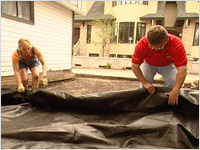
- Place a layer of black membrane over the entire excavated area. This is not your garden-variety landscape cloth. It is a geosynthetic membrane designed to hold in the gravel for compact packing. (see fig. C)
 |
|
 |
| Fig. C |
|
Fig. D |
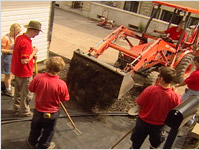
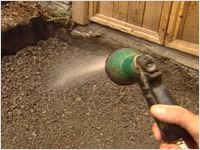
- Roll in the granular stone. Do this is two stages. First, fill the area to the 4-inch level with the stone. Smooth to a level surface, dampen with a hose and tamp down using the power compactor. Then bring in the remaining stone and smooth out to the 8-inch level. Dampen with the hose and compact. (see figs. D & E)
- It’s time to do the final grade preparation using stone dust and angle iron. You may want to consult a professional landscaper at this point to determine the proper grading for your property.
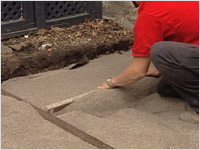
- Place the angle iron bars like a frame to the grade that you want. The 2-inch edge on the angle iron holds the stone dust in place and makes it easy to install the proper depth of stonedust. Simply fill up the area between the iron bars then run a long board over the top along the metal edges of the bars, and you have a uniform 2-inch depth of stonedust in the area. (see fig. F)
 |
|
 |
| Fig. E |
|
Fig. F |
- The stonedust is left loose, not compacted. But don’t walk on it!
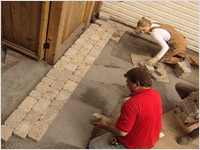
- NOW is the fun part. Install the stone. Enjoy the “Zen” experience of piecing together the puzzle and finding just the right stone for just the right place. If you need to walk on the stone dust area, lay large flat boards on the surface so that there are no indents. (see fig. G)
 |
|
 |
| Fig. G |
|
Fig. H |
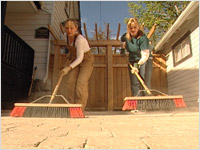
- When the stone is all in place, sweep the surface clean and tamp down with the power compactor. (see figs. H & I)
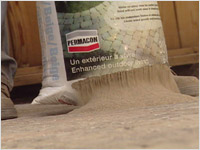
- Make sure that the surface of the stone is dry. Is it dry? Then open the bags of Permacon® polymeric sand. This is special sand used for paver joints. Fill the cracks between the stones to 1/8” below the top of the stone. Sweep the excess away from the top of the stones making sure that there is none remaining in the dimples of the stones. (see fig. J)
 |
|
 |
| Fig. I |
|
Fig. J |
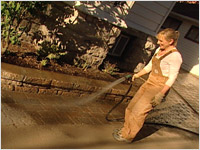
- Did you get it all off the surface? Good. Spray with a light mist of water. Dampen until the surface sand is wet, or for about 20 – 30 seconds. Wait 2 or 3 minutes and then dampen again for the same amount of time. When the polymeric sand dries, it goes hard and locks the bricks in to place. (see fig. K)
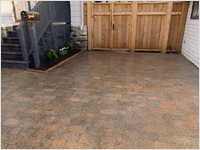
- Let dry for four hours before walking on the stones. (see fig. L)
- While you're waiting, how about that hot tub?
 |
|
 |
| Fig. K |
|
Fig. L |

Bergerac Pavers (driveway stones) For locations, please check their website
|
|
Permacon
|
| Work Crew |
|
S.J. Blondeau Landscaping Services
Steve Blondeau
613-978-4000
|
| Stone Dust and Gravel |
|
Ritchie’s Feed & Seed
1390 Windmill Lane
Ottawa, ON K1B 4V5
613-741-4430
|
|
 Previous Project | Installing Interlocking Stone Previous Project | Installing Interlocking Stone |
Project List |
|
|
|